Draw Boundary Tool
This tutorial explains how to draw a site boundary using the Site Submission / Site Request forms as part of the Biodiversity Net Gain Site Matching Service.
Please note that only one boundary can be submitted within a single form; additional boundaries require their own forms to be submitted.
The webmap uses basemapping provided by ©OpenStreetMap.
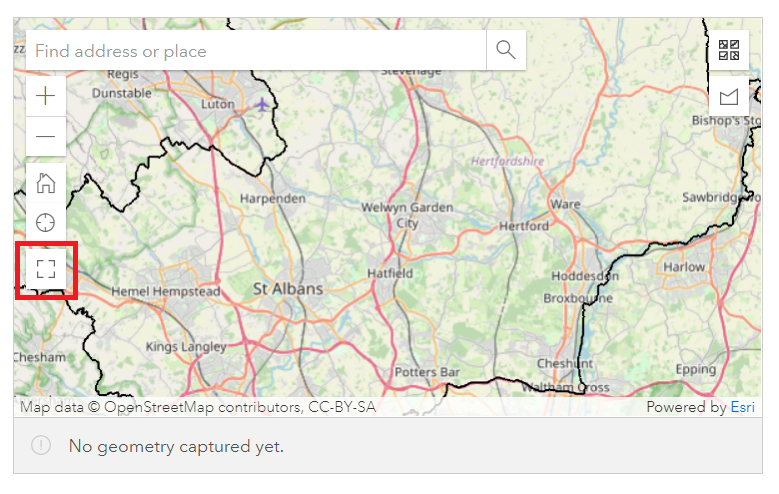
- It is recommended you make the map Full Screen, to allow you to digitise better. To do this click the Large Map button along the left.
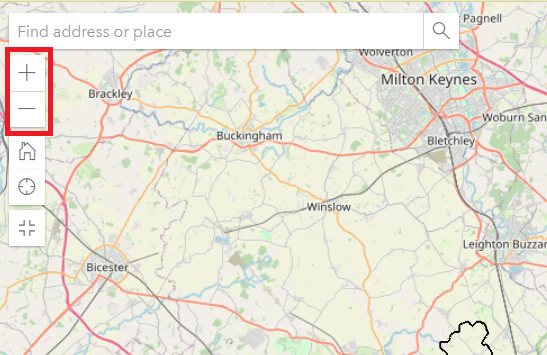
- When the map is full screen, you can scroll around by holding the left click on your mouse. You can zoom in and out of the map by using
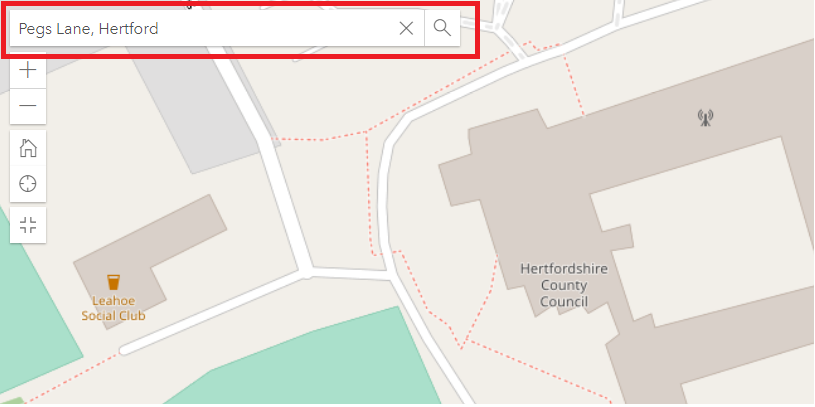
the scroll wheel on your mouse, or by using the plus and minus symbols found at the top left of the map. - If you want to zoom to a particular area, search for a full address / street / postcode using the search tool at the top left. After writing
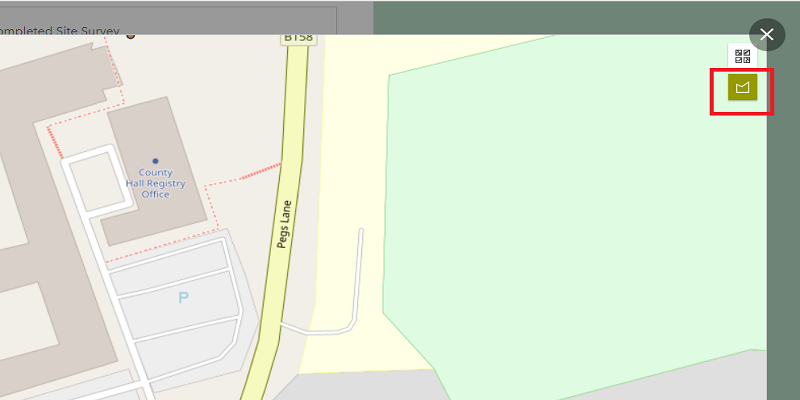
in your search hit enter or the magnifying glass beside the tool to zoom to the location. - Once you have arrived at your area of interest on the map, to begin drawing your boundary click the Area button located at the top right of the map.
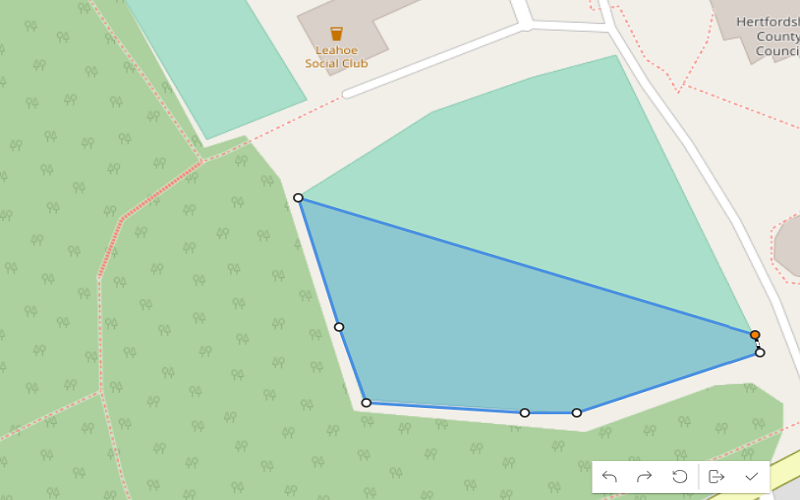
The button will be highlighted green when it is active, and an orange dot will appear where your mouse is. - Once the tool is active, click once on the map where you would like your boundary to start to begin drawing it. A white dot will appear where you clicked, and when you move your
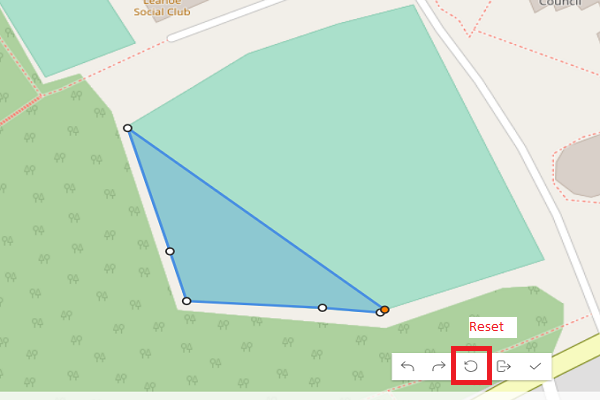
mouse a dashed line will appear from the point where you clicked. - Continue clicking where you would want your boundary to go; the area outlined blue shows how your boundary currently looks during the digitising process.
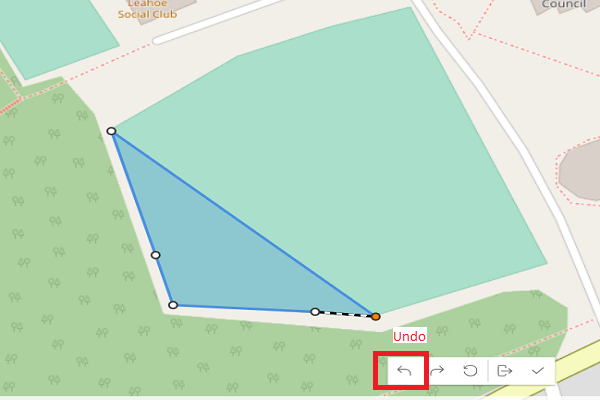
The white dots mark where you have previously clicked. - If you click on the wrong location, click the Undo button at the bottom of the map to revert to the previous point placed. If you want to re-draw your
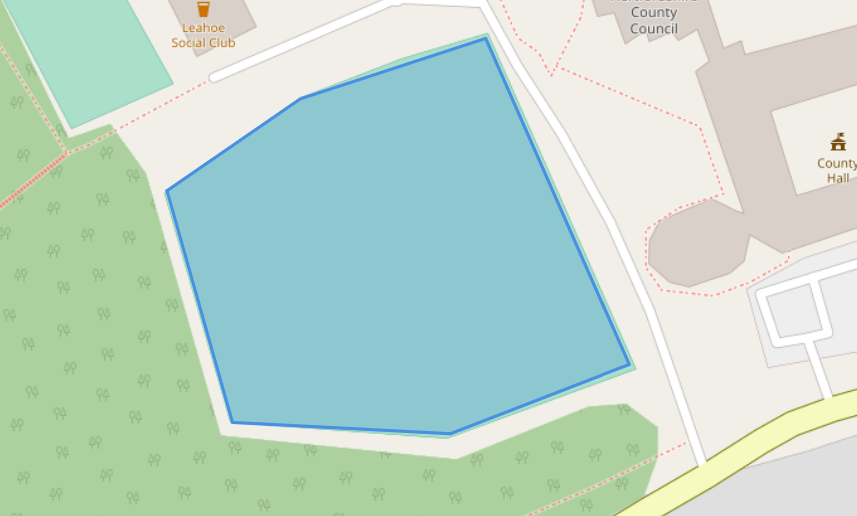
polygon from the beginning, click the Reset button at the bottom of the map. - Once you are happy with your boundary, double left-click the mouse on the final point drawn to finalise it. The dots will disappear, leaving only the blue boundary.
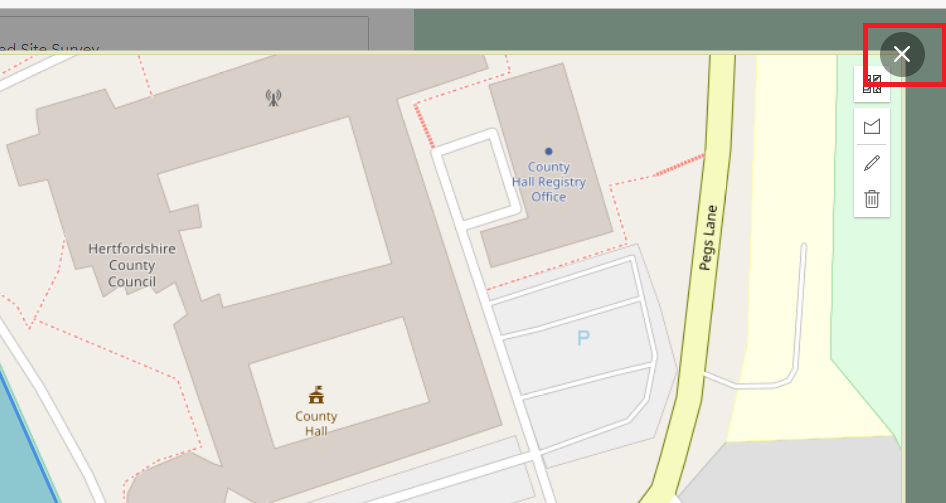
The Area button will also not be highlighted green anymore. - If you are happy with this polygon, click the X at the top right of the map to leave Full Screen mode. The map will then centre on the blue boundary drawn, and you
can continue with the form. - If you are unhappy with the finalised boundary drawn, you can either:
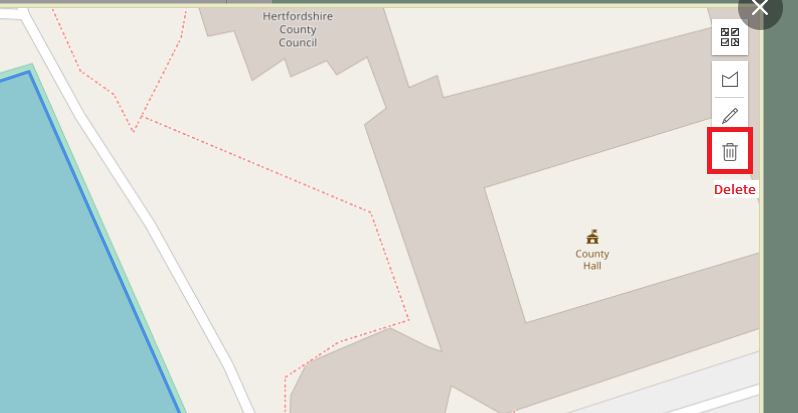
- Click the Delete button, located at the top right of the map (marked with a trash bin symbol). You can then redraw the boundary from the beginning.
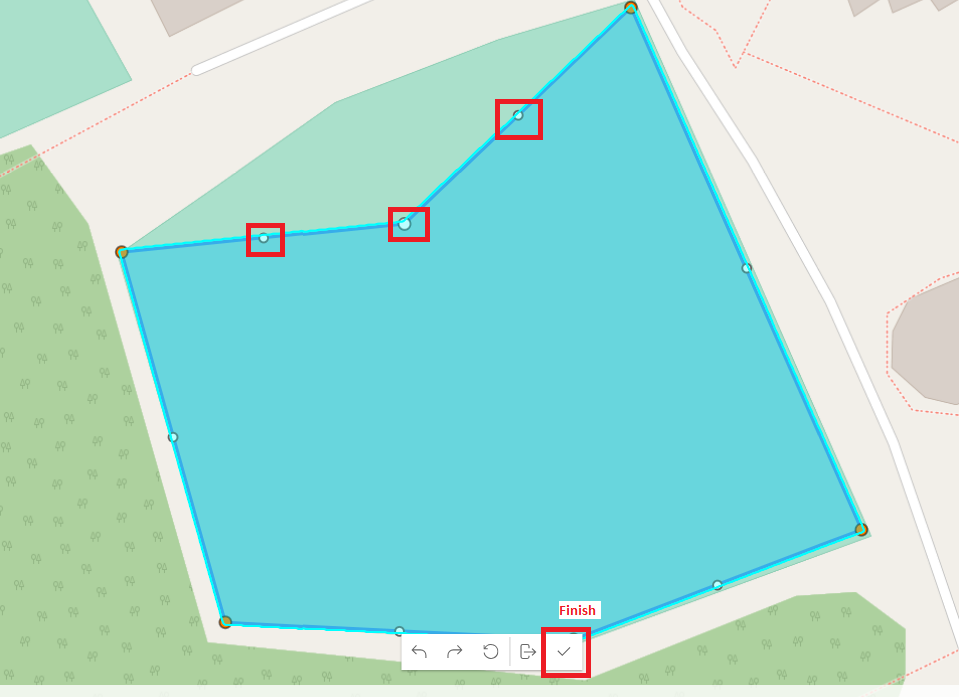
- Click on the blue boundary to enter Edit mode, where you can move the vertices you created. Once you are happy with any vertices you have moved, click the
Finish button at the bottom of the map, marked by a tick symbol. You can then click the X at the top right of the map, as outlined in step 9, and continue with the form.